
Hey, Creative friend!
heArt makes has a new home!!!
Just check my new site for more inspiration!!
Click here.
Hi, lovely creative friends!
It's been a long time since my last post here on the blog. Life is busy and time flies!!
But here I am again for a post for Life Documented 2018.
I?m much honored to post again for such an amazing and creative group in this month, May! my month! Yes my birthday month (ohhh and this year I will turn 40!!!! J). In this beautiful month the theme couldn’t be more in line with me!! Mandalas!! You might know that I love drawing mandalas, so this one was easy!! I also love to draw dream catchers, and since I started drawing mandalas I started a fusion with mandalas and dream catchers, which I love to draw.
So, I thought on a mandala dream catcher as a start point for this week prompt.
Theme: Mandalas
Prompt: colorful and messy backgrounds
Technique: create a colorful background and draw a
mandala dream catcher
Quote: Let your Art express your heart and soul (it
was on my mind, and I love it!!)


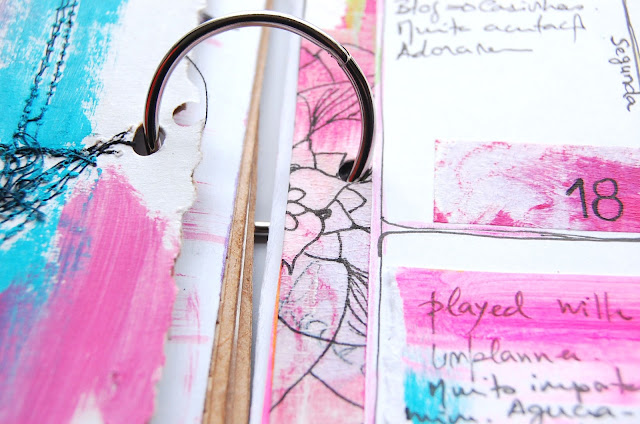
(TIP: if you decide to work on a separated
paper to add to your planner latter you might want to put some masking tape on
the edges to make a frame. In this case I put underneath the page a plastic bag
that I save from cereals and I adhere the paper and the masking tape to the
plastic. This is because after you work on the page you will get a gorgeous
washi tape to play with on your planner! I just love this technique)


After playing with the background I add some white acrylic
paint just to blend a little the colors and the page. And then I draw the
mandala dream catcher.


Draw the mandala dream catcher is absolutely simple. I draw
half of one mandala ( TIP: continue
drawing along the edges into the masking tape, for an even more gorgeous and
unique washy tape)
In the bottom of the mandala I draw the feathers od the
dream catcher.

I painted the feathers with white and colors, added a little more marks to the background and in the end I stamped Heart and soul, inspired on the quote that was in my mind when I was making this drawing.

TIP:
After you finish your page, take off the masking tape. Probably you will
have a stunning unique washi tape, and you will get surprised. Take a look at
some of mines that I use to embellish my unplanner, or artjournal.


Well my
friends hopping that you liked my ideas for this week and willowing to see what
you create.


